Tuesday, January 29, 2013

DIY iphone cases

Hey Everyone this is a new DIY project that i ran across because i love having new iPhone cases but hate paying $20 or more on each case. So i went to Johann's fabric store and found this amazing book on sale of all scrapbooking pages. 
Heres the DIY!!


Step 1: Get your materials ready
You will need scissors, pencils, corner rounder (optional), iPhone case, scrapbooking pages, and a page cutter

Heres the book i used
It cost me $8 on sale and it has 48 sheets in it 

Pick your page

Pick your placment and outline your iPhone case with a pencil.

Retrace over the line. 
Cut it out inside the line.
(you might need to cut it smaller depends on the case)

Cut the corners out.  
See if it fits. If it does then trace the camera hole. 

Cut it out with s knife or something sharp.

See if it fits again.
(make some minor adjustments in needed)


NOW LOOK HOW AMAZING THESE ARE!!!!!!!!
I saved myself around $220 in each case was $20 
My cost was around $40 for the case and the scrapbooking paper book
Thanks.

If you guys would like me to try and other DIY's you want to see just post a comment or ask me on Facebook.

Tuesday, January 22, 2013

MILITARY JACKET DIY

Hey Everyone, I recently went to a military outlet and found this jacket in the sale lot for $10. It was way to big for me in the sleeves and the waist area, so i decided this would be my next DIY.
 Hope everyone likes it.

BEFORE AND AFTER

                                                            
  So happy how it turned out!!! Want to see how i did it keep reading.


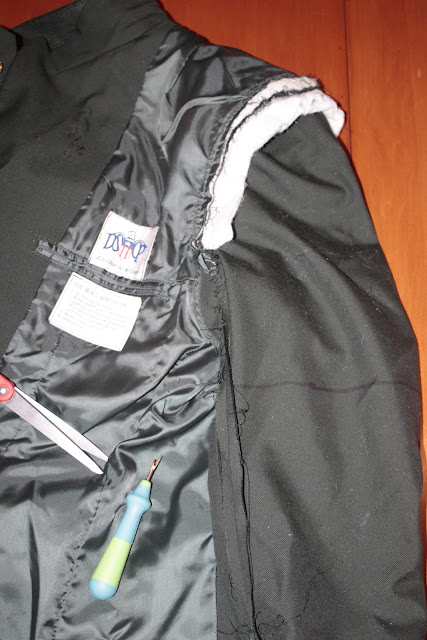
First flip your jacket inside out.
^^ Right there ^^
Second find the seam that attaches your sleeve the the coat

Next rip the seam
What it should look like after you take the lining out.
After make a line where you want the sleeve
(make sure you do it 1-1.5 inches lower to have room for the seam).


Make the line.

and cut it.

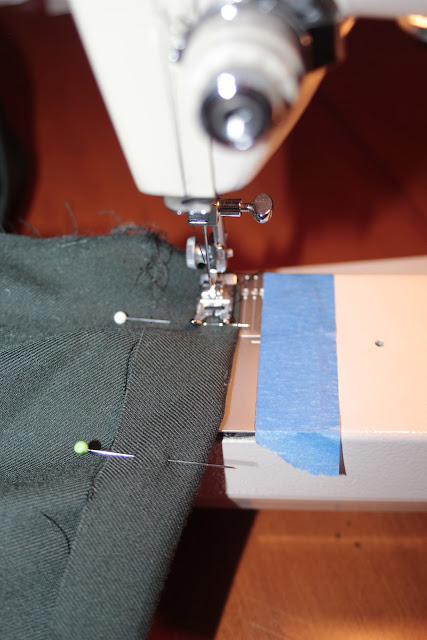
Pin it at a 1 inch seam.

 Sew the whole sleeve.

Next if you would like to add "darts", lay out your coat flat.

^^^^VERY IMPORTANT^^^^
If you would like to bring it in 1 inch take in 1/2 of inch on each side.
If your want to take it in 2 inches take a inch on each side.
 Etc...

This is hard to explain but pinch your coat the amount you would like to take in at the bottom  then pin. next you will pin all the way out till the "dart" tapers away. do on both sides. REMEMBER do half the amount you want to take in on each side.
^ Pin like this ^

This is the "dart" tapering 

After doing the "dart" on both sides take your needle and tread and do tacks at each point you pined 

After tacking it double knot it

should look like this ever your done.
After its all done 


Thanks everyone hope you learned something,
 please comment and subscribe.
XO

FOLLOW ME ON FACEBOOK
https://www.facebook.com/MANologyFashion


Saturday, January 12, 2013

WINTER OUTFIT'S

Hey again sorry i have not uploaded for awhile, i have started school and a new job so i have been super busy. this post is mostly winter clothes and a few things i got for christmas. Also there will be links to where i got these clothes all the way at the bottom of the post. 
Thanks XO

                                                                        OUTFIT 1:

                                                                       
                                                                      OUTFIT 2:


                                                                        OUTFIT 3:


 OUTFIT 4:

 Outfit 1:          
-Jacket, Military Thrift Shop
-Sweater, Gap
-Shirt, JCP/Claiborne 
-Pants, Abercrombie and Fitch

Outfit 2:
-Green Jacket, Wilson Leather 
-Levi Jacket, Vintage Thrift 
-Sweater, True Religion 
-Pants, Express
-Scarf, H&M

Outfit 3:
-Jacket, Trusty Zara 
-Polo, Ralph Lauren Polo (custom fit)
-Scarf, H&M
-Pants A&F

Outfit 4:
-Sweater, Old Navy 
-Shirt, DIY Project
Pants, A&F